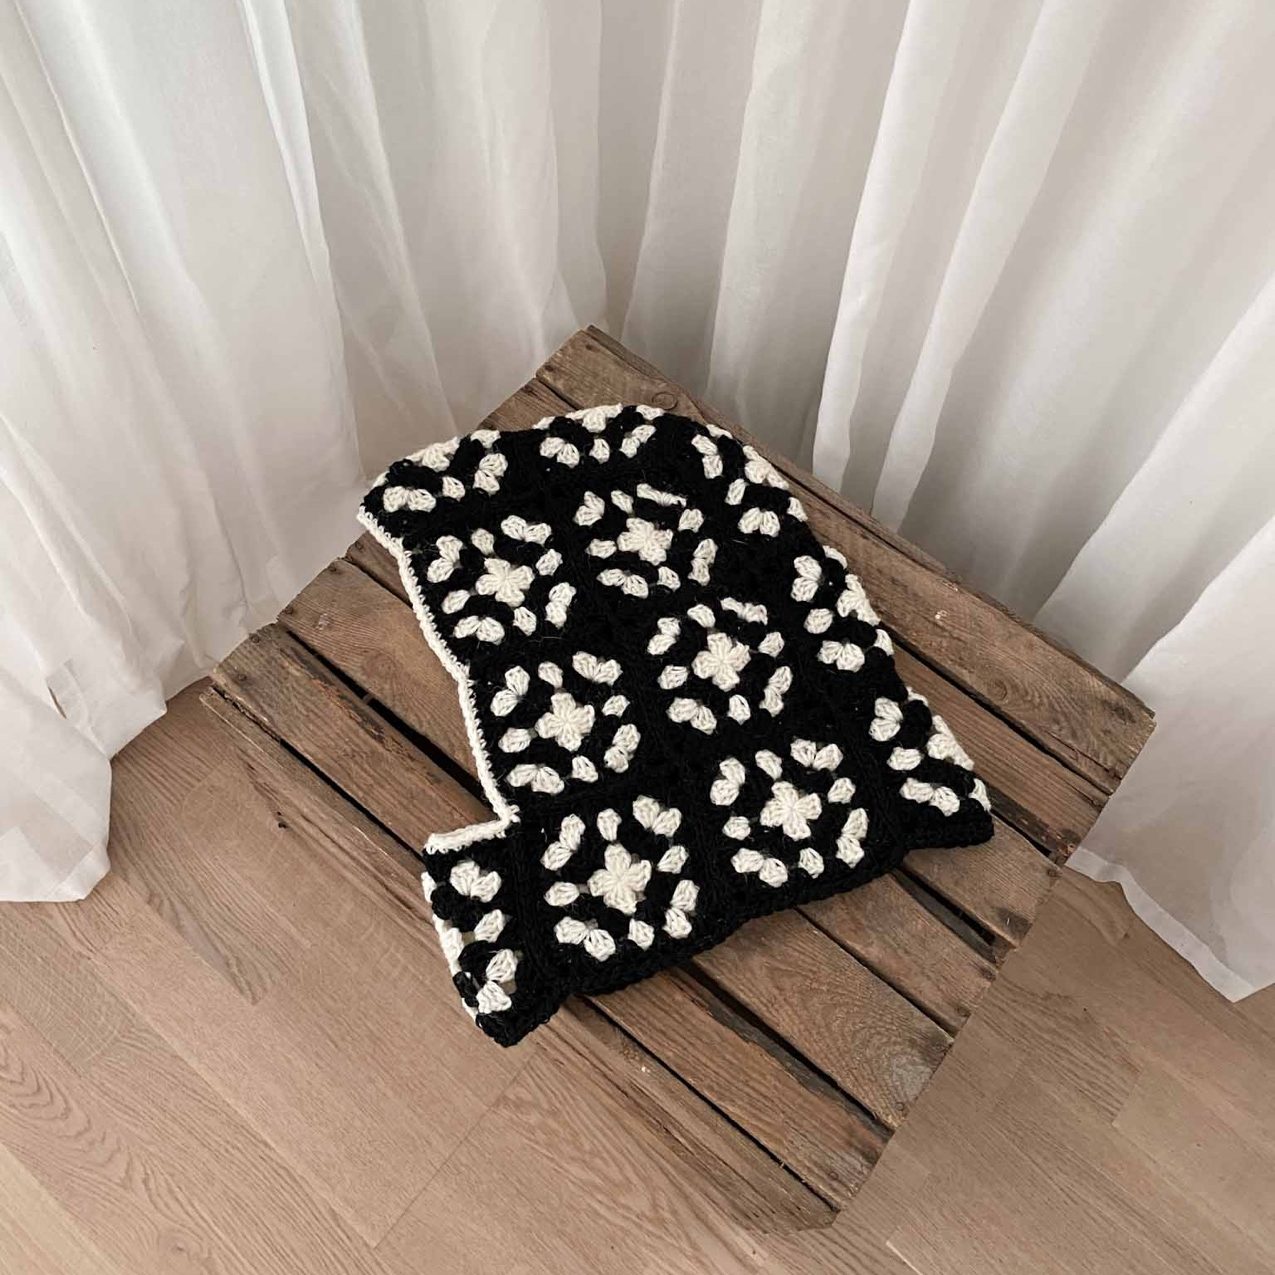
Looking for a crochet granny square balaclava free pattern? This cozy granny square balaclava will not only keep you warm but also make you stand out with its eye-catching look. Why not try this cool and functional trend and create a granny square balaclava (or balaclava hood) with your own two hands with this easy and free balaclava crochet pattern!
Loved this granny square balaclava pattern? Pin and save it for later!

Love granny square projects? Check out other free granny square crochet patterns:
Granny square bag free crochet pattern
Granny square top free crochet pattern
Granny square AirPods case free crochet pattern
(*This post contains some affiliate links and I may receive commissions for purchases made through links in this post at no extra cost to you. Affiliate links are marked as *.)
Materials and Specifications of the Granny Square Balaclava Crochet Pattern
The granny square balaclava crochet pattern is perfect for crocheters of all skill levels. Start crafting your balaclava today!
- Tool: Crochet Hook 4,5 mm (US 7)* and a tapestry needle.
- Yarn: Any aran-weighted wool yarn (aran yarn suggestions*). Yarn used in the balaclava: Novita 7 veljestä* in color black (2 balls, a total of 200 g) and white (1 ball, a total of 100 g). One 100 g ball of black yarn might be enough but not necessarily. That’s why I suggest 200 g of black yarn.
- Substitute yarns (remember to check the gauge):
- Make the balaclava softer by using alpaca yarns, such as Drops Lima* or merino wool yarns!
- Gauge: 12 sts and 7 rows (10 cm / 4″) in dc stitches.
- Terminology: US.
- Size of a granny square: 12 x 12 cm (4.7″ x 4.7″).
Don’t forget to experiment with different color combinations and embellishments! From bold and vibrant to soft and muted, the possibilities are endless.
Get Snuggly Crochet Scoodie Pattern!
Find the new crochet hooded scarf pattern on Etsy or for a cheaper price on Ravelry!

How to Crochet a Balaclava?
- Crochet a total of 18 classic crochet granny squares.
- Join granny squares using a flat slip stitch method. Find the image of the granny square assembly later in the pattern.
- Finish the face and neck edging.

Classic Granny Square Crochet Pattern
Each granny square has a total of 4 rounds. Rounds 1 and 3 are worked with white yarn and rounds 2 and 4 with black yarn. If you’re new to granny squares, don’t worry! There are countless tutorials available online to help you master the granny square.
Round 1: Start with white yarn. Make a magic ring and chain (ch) 3 on it (counts as one double crochet stitch (dc)). Work 2 dc into the ring. Ch 3. *Work 3 dc to the ring (3-dc-shell). Ch 3.*. Repeat * two more times. Close the round joining with a slip stitch (sl st) to the top of initial ch-3. You should have four 3-dc-shells with ch-3 corners.
Round 2: Change the yarn to black. Work slip stitches into the next two stitches. Ch 3 in the first ch-3 corner space. In the same ch-3 corner space, work 2 dc, ch 3 and 3-dc-shell. *In the next ch-3 corner space, work 3-dc-shell, ch 3 and 3-dc-shell.* Repeat * two more times. Join with a sl st to the top of the initial ch-3.
Round 3: Change the yarn to white. Work slip stitches into the next two stitches. Ch 3 in the first ch-3 corner space. In the same ch-3 corner space, work 2 dc, ch 3 and 3-dc-shell. In the next space between previous round’s 3-dc-shells, work 3-dc-shell. *In the next ch-3 corner space, work 3-dc-shell, ch 3 and 3-dc-shell. In the next space between previous round’s 3-dc-shells, work 3-dc-shell.* Repeat * two more times. Join with a sl st to the top of the initial ch-3.
Round 4: Change the yarn to black. Work slip stitches into the next two stitches. Ch 3 in the first ch-3 corner space. In the same ch-3 corner space, work 2 dc, ch 3 and 3-dc-shell. In the next space between previous round’s 3-dc-shells, work 3-dc-shell. Work another 3-dc-shell to the next space between previous round’s 3-dc-shells. *In the next ch-3 corner space, work 3-dc-shell, ch 3 and 3-dc-shell. In the next space between previous round’s 3-dc-shells, work 3-dc-shell. Work another 3-dc-shell to the next space between previous round’s 3-dc-shells.* Repeat * two more times. Join with a sl st to the top of the initial ch-3.
Crochet 18 identical squares (or with different colors!). Weave in the ends. For a neat finish, block or steam the squares.
Join the Granny Squares
Join the granny squares together using a flat slip stitch method. Find how to assemble and join the squares in the granny square balaclava layout image below. The square sides of the same color are also joined together. This will form the shape of the balaclava.

Finish the Face and Neck Edging of the Crochet Balaclava
Face Edging – With white yarn, finish the face edging by working sc stitches around the face edging. Work another round but with slip stitches. Weave in the ends.
Neck Edging – With black yarn, finish the neck edge by working sc stitches around the neck edging. Weave in the ends.

I hope you found this granny square balaclava free crochet pattern enjoyable and easy to follow!
Let’s Try Some Other Cool Crochet Patterns!
Free Crochet Bandana Pattern
20+ Crochet Sweater Patterns
Free Crochet Bucket Hat Pattern
Free Crochet Handbag Pattern
Free Granny Square AirPods Case Pattern
Free Granny Square Top Crochet Pattern
Free Crochet Bralette Pattern
Breton Tank Top Crochet Pattern
Free Crochet Hair Scrunchie Pattern


One response to “Cool Granny Square Balaclava Free Crochet Pattern”
[…] Get the Pattern Here […]